Now Reading: How to Export Audio and Video in Ableton Live
-
01
How to Export Audio and Video in Ableton Live

Learn how to export audio in Ableton Live. Get a better understanding of all the render settings for both Arrangement View and Session View.

Ableton Live
’s Export Audio/Video command allows you to render audio as new sample files. Rendered audio files can be a full-length song, single tracks, or a looped range of time. Rendered audio can be used for mastering, stem mixing, online streaming, backups, listening, and other reasons.
Though exporting audio in Live is easy, there are some decisions to make as part of the process. This
guide
looks at Ableton Live’s exporting options.
How to Export Audio in Ableton Live
Exporting audio from Live can be done from both the Arrangement and Session Views. All the export settings are accessible from the File menu’s Export Audio/Video command.
The Export Audio/Video command also provides settings for exporting video. You can even upload your exported audio files to your SoundCloud account.
Exporting from Arrangement View
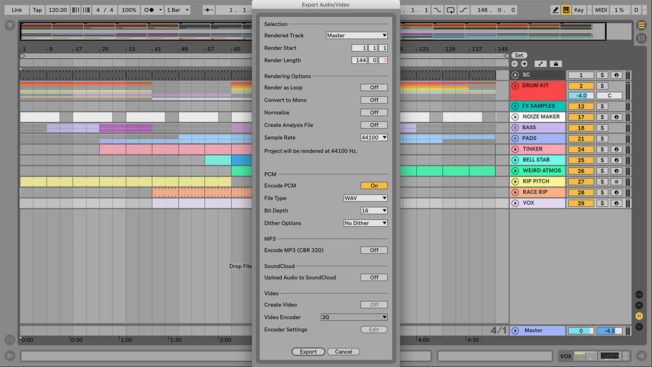
Exporting audio from the Arrangement View is the most common method. This view makes it easier to render a full song or its separate tracks. The process is simple:
Exporting from Session View
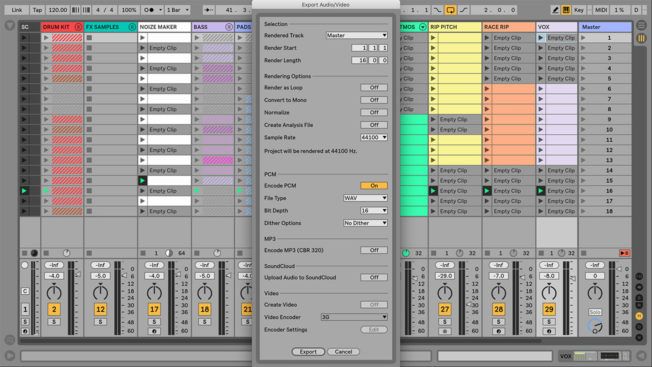
Live will export all clips with activated clip launch buttons when exporting from Session View. Ensure to launch all the clips you want to export before following these steps:
Export Audio/Video Settings
The export settings define the results of rendered audio. Below are brief descriptions of the various options.
Selection Options
Rendering Options
Encoding Options
MP3 Options
SoundCloud Options
Video Options
Conclusion
Do you plan on sending your track out for mastering? It’s best to check which render settings the mastering engineer prefers. Also, try exporting some audio with different render settings to hear the differences.
")
")


")


")